How To Pierce Your Own Nose Safely And Painlessly
If you’ve been itching to get your nose pierced but don’t want to fork out the cash to have it done professionally, you may be considering doing it yourself. DIY piercings can be risky if not done properly, but with the right tools, techniques and aftercare, you can successfully pierce your own nose right at home.
In this comprehensive guide, we’ll walk you through everything you need to know to pierce your nose safely and painlessly.
If you’re short on time, here’s a quick answer to your question: You’ll need a piercing needle, clamp, rubbing alcohol, mark pen, nose screw or ring, and saline solution to pierce your nose at home. Sterilize and clamp the area, mark the spot, push the needle through quickly, insert jewelry and care for it 2-3 times a day with saline solution while it heals over 6-8 weeks.
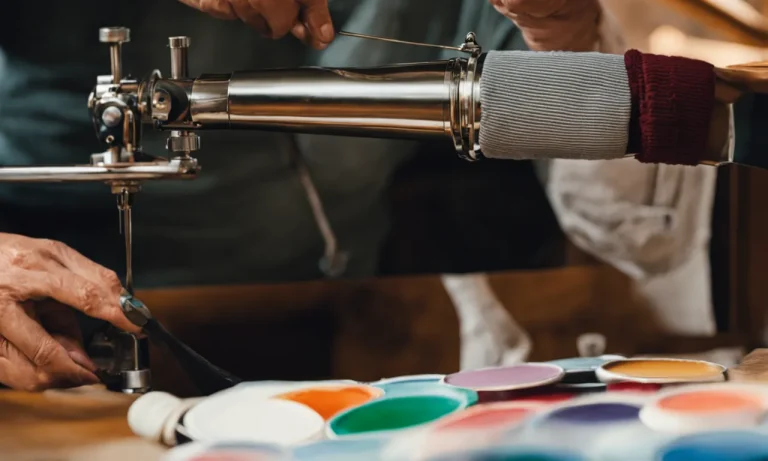
Gather the Proper Piercing Supplies
Piercing needle
The first item you will need to gather is a high-quality piercing needle. It is crucial to use a sterile needle to minimize the risk of infection. Look for a needle specifically designed for nose piercings, as they are thinner and easier to handle.
Remember, never reuse a needle, as it can lead to serious complications. Dispose of the needle properly after use.
Clamp
A clamp is an essential tool for nose piercing as it helps hold the skin in place, making the process more precise and less painful. It also minimizes the risk of the needle slipping. Make sure to choose a clamp that is suitable for nose piercings and ensure it is properly sterilized before use.
Rubbing alcohol
Before starting the piercing process, it is vital to clean the area thoroughly. Use rubbing alcohol to disinfect the skin around your nose. Alcohol helps kill bacteria and reduces the risk of infection. Remember to use a clean cotton pad or swab and gently wipe the area.
Marking pen
Using a marking pen is crucial to ensure accurate placement of the piercing. Mark the exact spot where you want the piercing to be, taking into consideration the shape of your nose and your personal preference. This step helps you avoid any misalignment or unevenness in the piercing.
Nose screw or ring
Once the piercing is complete, you will need a nose screw or ring to insert into the newly pierced hole. Choose a high-quality, hypoallergenic piece of jewelry to minimize the risk of irritation or allergic reactions.
It’s essential to select a size and style that suits your personal taste and comfort.
Saline spray
Aftercare is a crucial part of the piercing process. Saline spray is an excellent option for cleaning and healing the piercing. It helps remove any debris or bacteria and promotes faster healing. Use a sterile saline solution to gently clean the piercing twice a day, following the instructions provided by your piercer or a healthcare professional.
Remember, it is always recommended to consult with a professional piercer before attempting to pierce your own nose. They can provide guidance, ensure you have the necessary supplies, and offer advice specific to your situation.
Safety should always be your top priority when it comes to body modifications.
Sterilize and Mark the Piercing Site
Clean the piercing area thoroughly
Before attempting to pierce your own nose, it is crucial to ensure that the piercing area is clean to prevent any infections. Start by washing your hands thoroughly with soap and warm water. Then, use a gentle cleanser to clean the surface of your nose.
Make sure to remove any dirt or oil buildup as this can interfere with the piercing process.
Clamp the nose area
Once the piercing area is clean, it is important to use a sterilized piercing clamp to hold the nose securely in place. This will help to ensure accuracy and minimize any potential pain or discomfort during the piercing process.
The clamp should be placed gently on the nose, avoiding excessive pressure that could cause unnecessary pain.
Mark the exact piercing location
Before you begin the actual piercing, it is crucial to mark the exact location where you want the piercing to be. This can be done using a sterile pen or marker. Take your time to carefully decide on the placement, considering factors such as symmetry and personal preference.
Remember that once the piercing is done, it may be difficult to change the location without causing complications.
It is important to note that while these steps can provide a general guideline for safely and painlessly piercing your own nose, it is always recommended to seek professional help from a licensed piercer. They have the expertise and experience to ensure a safe and successful piercing process.
If you decide to proceed on your own, make sure to research and follow all safety precautions to minimize any risks.
Pierce Your Nose Carefully
Piercing your own nose can be an exciting and empowering experience. However, it’s important to approach the process with caution and care to ensure a safe and painless experience. Here are some key steps to follow when piercing your nose:
Line up the needle and take deep breaths
Before you begin, make sure you have a sterilized needle specifically designed for piercing. You can purchase one from a reputable online store or a local piercing shop. Once you have the needle, find a quiet and well-lit space where you can comfortably perform the piercing.
Take a deep breath to calm your nerves and focus your mind on the task at hand.
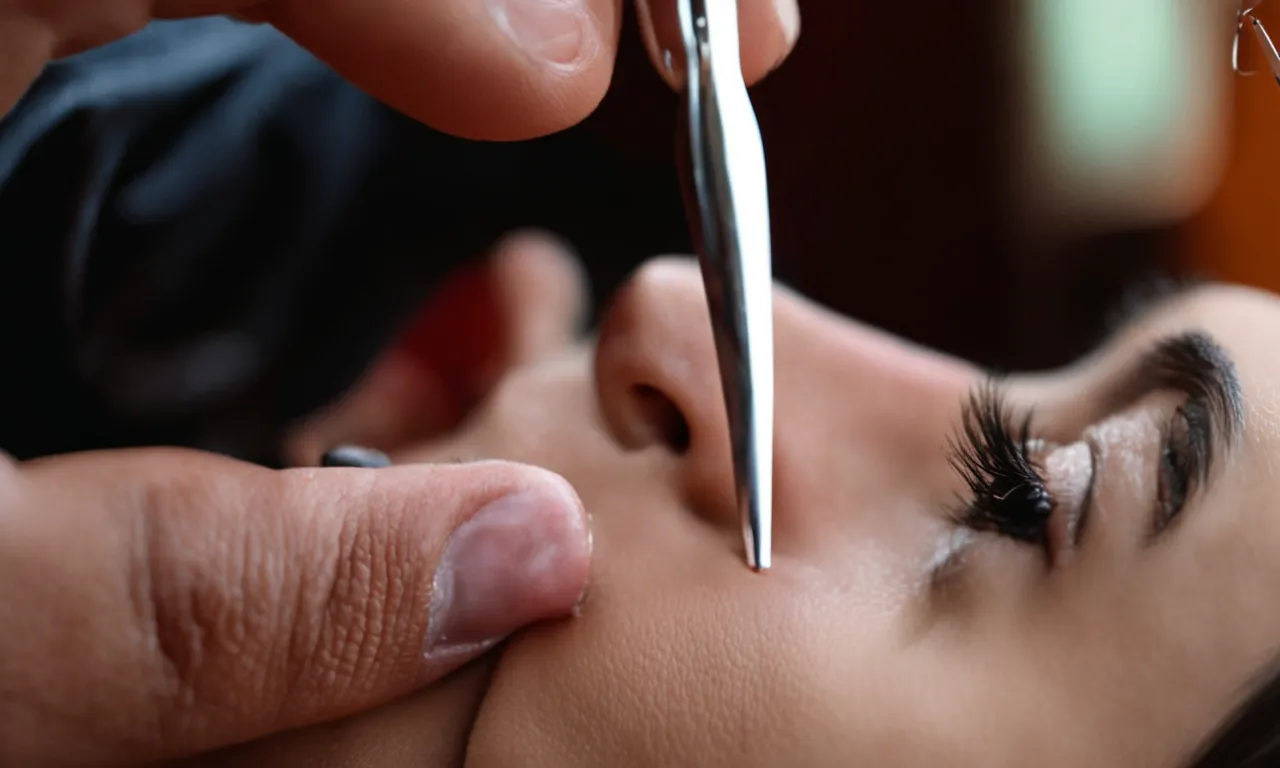
Push the needle through the marked spot swiftly
Mark the spot where you want to pierce your nose using a sterile pen or marker. Ensure that the marked spot is in the desired position and aligns with your aesthetic preferences. With a steady hand, hold the needle perpendicular to your nose and swiftly push it through the marked spot.
Be assertive but gentle, applying steady pressure until the needle passes through.
Insert jewelry immediately into the piercing
As soon as the needle is through, remove it carefully and quickly insert the jewelry into the piercing. Make sure the jewelry is also sterilized and specifically designed for nose piercings. Gently slide it into place, being mindful not to apply excessive force or pressure.
Once the jewelry is inserted, secure it with the provided backing or screw it tightly to prevent it from accidentally falling out.
Remember, it’s crucial to maintain proper hygiene throughout the entire piercing process. Wash your hands thoroughly before and after the procedure. Cleanse the pierced area with a saline solution recommended by a professional piercer or an antiseptic solution.
Avoid touching the piercing unnecessarily and refrain from changing or removing the jewelry until the piercing has fully healed.
If you’re unsure about the process or have any concerns, it’s always best to consult a professional piercer. They can provide expert guidance and ensure that the piercing is done safely and hygienically.
For more information and tips on nose piercing, you can visit SafePiercing.org – a trusted resource for safe body piercing practices.
Clean and Care for the Piercing
Once you have successfully pierced your nose, it is crucial to keep the area clean and properly cared for to avoid any complications. Here are some essential steps to follow:
Wash hands and clean the area
Before touching your newly pierced nose, make sure to thoroughly wash your hands with soap and warm water. This step is crucial to prevent any dirt or bacteria from entering the piercing site. Use a mild, fragrance-free soap and gently clean the area around the piercing with a cotton swab soaked in saline solution.
Remember to be gentle and avoid rubbing the piercing too vigorously.
Apply saline spray 2-3 times daily
Using a saline spray is an effective way to keep your piercing clean and free from infection. Saline solution helps to remove any debris and promotes healing. It is recommended to spray the saline solution on your piercing 2-3 times a day.
You can find saline sprays specifically made for piercings at your local drugstore or online.
Avoid touching or moving jewelry
It is important to resist the temptation to touch or move your jewelry during the healing process. Touching the piercing with dirty hands can introduce bacteria, leading to infections or irritations. Additionally, moving the jewelry can disrupt the healing process and cause unnecessary pain.
So, try to keep your hands away from your nose and avoid fiddling with the jewelry.
Watch for signs of infection
While most nose piercings heal without any complications, it is essential to keep an eye out for any signs of infection. These can include increased redness, swelling, discharge, or persistent pain. If you notice any of these symptoms, it is crucial to seek medical advice immediately.
Prompt treatment can help prevent the infection from worsening and ensure proper healing.
Remember, proper cleaning and care are key to a safe and painless healing process for your nose piercing. By following these guidelines, you can enjoy your new piercing while minimizing the risk of complications.
Conclusion
If you follow all sterilization, piercing and aftercare steps properly, you can successfully and safely pierce your own nose at home. Make sure to do thorough research beforehand and invest in high-quality piercing supplies.
With patience and diligent wound cleaning, your DIY nose piercing should heal beautifully within 6-8 weeks.