
How To Shorten A Shirt Without Sewing: A Step-By-Step Guide
Have you ever bought a new shirt that was just a little too long? Rather than letting it gather dust in your closet, you can easily shorten it without sewing by following a few simple techniques. In this comprehensive guide, we’ll walk you through multiple no-sew methods to tailor a shirt to the perfect length.
If you need a quick fix, here’s the shortest answer: Fold over the shirt hem to the desired length and secure it with fabric glue, iron-on hem tape, or small stitches that can be removed. For a more polished look, use fabric glue and fusible web to create a clean folded hem.
Determine How Much to Shorten the Shirt
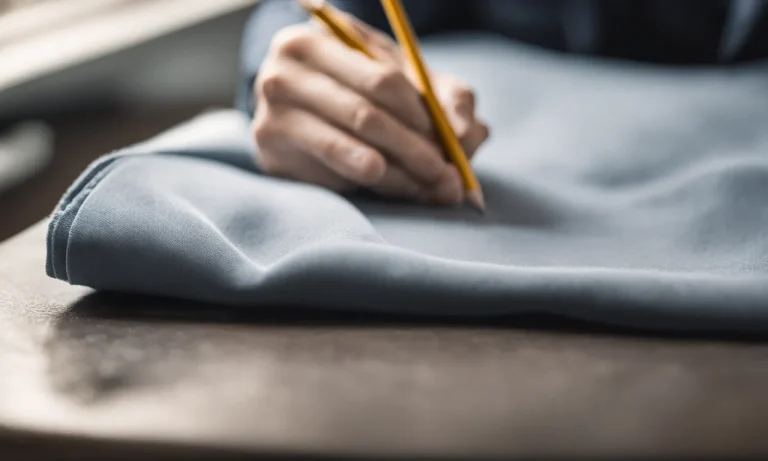
Try on the shirt and mark the ideal length
The first step in shortening a shirt without sewing is to determine the ideal length. Put on the shirt and stand in front of a mirror. Take note of where you would like the shirt to end. Using a fabric marker or chalk, mark the desired length on both sides of the shirt.
This will serve as your guide when shortening the shirt.
Account for any shrinkage after washing
It’s important to consider that some fabrics may shrink after washing. If you want to avoid the shirt becoming too short after a few washes, it’s a good idea to account for potential shrinkage when determining how much to shorten the shirt.
Check the care label on the shirt to see if it provides any information on shrinkage percentages. If not, you can always play it safe by leaving a little extra length when marking the shirt.
Consider the original shirt hem
When shortening a shirt without sewing, it’s important to consider the original hem. If the shirt has a curved or decorative hem, you may want to preserve it to maintain the original look of the shirt. Take note of the length of the original hem and make sure to mark your desired length above it.
This way, you can easily trim the excess fabric without losing the original hemline.
For more information on determining the ideal length for your shirt, you can visit FashionBeans. They provide detailed guidelines on how a dress shirt should fit and where it should end.
Fold and Pin the New Shirt Hem
When it comes to shortening a shirt without sewing, one of the first steps is to fold and pin the new shirt hem. This method is perfect for those who don’t have access to a sewing machine or prefer not to sew. Here’s a step-by-step guide to help you through the process:
Lay the shirt flat and fold up the bottom hem
The first thing you need to do is lay the shirt flat on a clean surface. Smooth out any wrinkles or creases so that you have a clear area to work with. Once the shirt is flat, take the bottom hem and fold it up to the desired length. This will create a new hemline for your shirt.
Use pins to temporarily hold the fold in place
After folding the hem, use pins to temporarily hold the fold in place. Start by placing a pin at each corner of the folded hem to secure it. Then, continue placing pins along the folded edge every few inches. This will ensure that the new hem stays in place while you’re wearing the shirt.
Check the new length in a mirror
Once you have pinned the new hem, it’s important to check the length in a mirror. Put the shirt on and stand in front of a mirror to get a better idea of how it looks. Make any necessary adjustments by folding the hem up or down until you’re happy with the length.
Remember, it’s always better to start with a longer length and gradually shorten it if needed.
By following these steps, you’ll be able to shorten your shirt without sewing. It’s a quick and easy method that anyone can do. However, keep in mind that this method is temporary and may not be as durable as sewing.
If you want a more permanent solution, consider taking your shirt to a tailor or learning basic sewing skills.
Secure the Folded Hem
Once you have measured and marked the desired length for your shirt, it’s time to secure the folded hem. There are several methods you can use to achieve this, depending on your preference and the materials you have on hand.
Method 1: Fabric glue
If you don’t have access to a sewing machine or simply prefer not to sew, fabric glue can be a great alternative. It is easy to use and provides a strong hold. To secure the folded hem using fabric glue, follow these steps:
- Apply a thin line of fabric glue along the edge of the folded hem.
- Press the hem down firmly to ensure it adheres to the fabric.
- Allow the glue to dry completely before wearing or washing the shirt.
Note: It is important to choose a fabric glue that is suitable for the type of fabric your shirt is made of. Always follow the manufacturer’s instructions for best results.
Method 2: Iron-on hem tape
Iron-on hem tape is another great option for securing the folded hem without sewing. This adhesive tape is activated by heat and creates a strong bond between the fabric layers. Here’s how to use iron-on hem tape:
- Place the tape along the edge of the folded hem, between the fabric layers.
- Use a hot iron to press the tape, following the manufacturer’s instructions.
- Allow the tape to cool and set before wearing or washing the shirt.
Tip: Iron-on hem tape comes in different widths, so make sure to choose the appropriate size for your shirt hem.
Method 3: Hand-sewn basting stitches
If you have basic sewing skills and prefer a more traditional approach, you can secure the folded hem with hand-sewn basting stitches. This technique involves temporary stitches that hold the folded hem in place until it can be permanently sewn. Here’s how to do it:
- Thread a needle with a contrasting thread color that matches your fabric.
- Make small, even stitches along the edge of the folded hem, securing it to the fabric.
- Once you have completed the basting stitches, try on the shirt to ensure the length is correct before proceeding with permanent sewing.
Fun Fact: Basting stitches are named after the technique of using loose temporary stitches, similar to a basting stitch used in cooking to hold fabric layers together temporarily.
Remember, each of these methods can be effective in securing the folded hem of your shirt without sewing. Choose the one that suits your preference and materials available to achieve a professional-looking finish.
Create a Clean, Folded Hem
When shortening a shirt without sewing, creating a clean, folded hem is essential to achieve a polished look. Here are some steps you can follow:
Iron the folded hem flat
The first step is to iron the folded hem flat. This will ensure that the hem is even and neat. Use a hot iron and press the folded edge of the fabric, removing any wrinkles or creases. Make sure to fold the hem to the desired length before ironing.
Apply fabric glue inside the fold
Once you have ironed the folded hem, you can secure it in place using fabric glue. Apply a thin line of fabric glue along the inside fold of the hem. Be sure to spread the glue evenly to prevent any lumps or bumps.
Use fusible web to bond the fold
If you prefer a more permanent solution, you can use fusible web to bond the fold. Fusible web is an adhesive material that can be activated with heat. Simply cut a strip of fusible web slightly shorter than the length of the hem and place it inside the fold.
Press the fold with a hot iron to activate the adhesive and bond the fabric together.
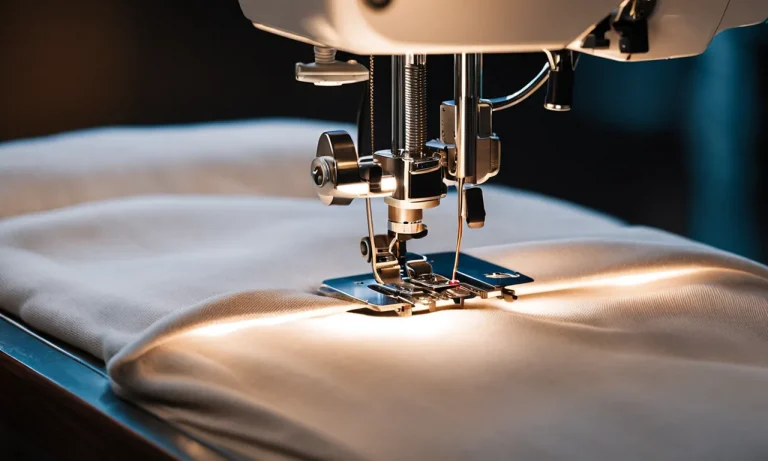
Topstitch along the inside hem edge
To give your folded hem a finished look, you can topstitch along the inside edge of the hem. Use a sewing machine or a needle and thread to stitch close to the edge of the fabric. This will add stability to the hem and prevent it from unraveling over time.
Remember to take your time and be precise when creating a folded hem without sewing. Practice on scrap fabric before working on your actual shirt to ensure you get the desired result. With a little patience and attention to detail, you can shorten your shirt without sewing and have it look great!
Other No-Sew Hemming Techniques
Zigzag stitch through shirt and hem
If you don’t have a sewing machine or simply want to avoid sewing altogether, there are other no-sew techniques you can try. One method is to use a zigzag stitch through the shirt and the hem. This technique involves using a sewing machine to create a zigzag stitch along the edge of the fabric, securing the hem in place without sewing it.
To do this, start by folding the shirt to the desired length, then use a fabric marker or pins to mark the new hemline. Next, set your sewing machine to a zigzag stitch and carefully sew along the edge of the fabric, making sure to catch both the shirt and the folded hem.
This will create a secure and neat finish without the need for traditional sewing.
Use hem clips instead of pins
Another no-sew option for hemming a shirt is to use hem clips instead of traditional pins. Hem clips are small clips that can hold fabric in place without damaging or leaving holes in the material. They are especially useful for delicate or stretchy fabrics that may be easily damaged by pins.
To use hem clips, fold the shirt to the desired length and use a fabric marker or measuring tape to mark the new hemline. Then, simply clip the hem clips along the edge of the fabric, securing the hem in place.
Hem clips are easy to adjust and remove, making them a convenient alternative to sewing or pinning.
Sew on snaps to keep the hem in place
If you prefer a more permanent solution for hemming a shirt without sewing, you can sew on snaps to keep the hem in place. Snaps are small fasteners that can be easily attached to fabric and provide a secure closure.
To use snaps, fold the shirt to the desired length and mark the new hemline. Then, sew one half of the snap onto the inside of the shirt, near the hem, and the other half onto the hem itself. When the shirt is folded, the snaps will align and hold the hem securely in place.
Remember, when using snaps or any other no-sew technique, it’s important to choose a method that is suitable for the fabric of your shirt. Delicate or stretchy fabrics may require gentler techniques, while sturdier fabrics may be more forgiving.
While these no-sew techniques can be a great option for shortening a shirt without sewing, it’s important to keep in mind that they may not be as durable or long-lasting as traditional sewing methods. If you’re looking for a more permanent solution, sewing may be the best option.
However, these techniques can be a quick and easy way to temporarily alter the length of your shirt without the need for a needle and thread.
Conclusion
Shortening a too-long shirt is an easy sewing-free project for any wardrobe. By folding up the shirt hem, securing it with fabric glue or tape, and pressing it flat, you can tailor any oversized top to the perfect length.
For a professional look, create a neat double-fold hem with fusible web and an edge stitch. With these simple no-sew techniques, you can quickly adjust shirt lengths and unlock the full potential of your closet.