
Sewing Tools And Their Uses: The Complete Guide
Sewing can be an extremely rewarding and relaxing hobby. However, having the right tools on hand is essential for successful and enjoyable sewing projects. This comprehensive guide will provide an overview of the must-have sewing tools that both beginner and experienced sewers need in their craft rooms.
If you’re short on time, here’s a quick answer to your question: The most essential sewing tools include sewing needles, pins, thread, seam rippers, scissors, thimbles, tracing wheels, measuring tapes, and irons.
Having these basic tools on hand will allow you to complete a wide variety of sewing projects.
In this nearly 3000 word guide, we will explore the uses and benefits of over 15 different sewing tools. Whether you are tackling your first project or looking to expand your existing supplies, this article covers the sewing tools you’ll want to have in your arsenal.
Sewing Needles
Hand Sewing Needles
Hand sewing needles are an essential tool for any sewing project. These needles come in various sizes and types, each designed for specific tasks. The most common types of hand sewing needles include:
- Sharps: These needles have a sharp point and are perfect for general sewing tasks like sewing seams and attaching buttons.
- Embroidery Needles: These needles have a larger eye and a sharp point, making them ideal for embroidery work and decorative stitching.
- Ballpoint Needles: These needles have a rounded point and are suitable for sewing on knits and other stretchy fabrics, as they prevent the fabric from getting damaged.
- Beading Needles: These needles are long, thin, and flexible, allowing them to easily pass through small beads and sequins.
When choosing a hand sewing needle, it is important to consider the type of fabric and the desired outcome of your project. Remember to always use the appropriate needle size for the fabric you are working with, as using a needle that is too large or too small can result in uneven stitches or fabric damage.
Machine Sewing Needles
Machine sewing needles are specifically designed for use with sewing machines. They are available in various sizes and types to accommodate different fabrics and sewing techniques. Some common types of machine sewing needles include:
- Universal Needles: These needles are the most commonly used and are suitable for a wide range of fabrics, including woven and knit fabrics.
- Ballpoint Needles: Similar to hand sewing ballpoint needles, these machine needles have a rounded point and are ideal for sewing on knits and stretch fabrics.
- Denim Needles: These needles have a sharp point and are designed for sewing on denim and other heavy fabrics.
- Embroidery Needles: These needles have a larger eye and a sharp point, making them perfect for machine embroidery and decorative stitching.
When using a sewing machine, it is crucial to use the correct needle for the fabric you are working with. Using the wrong needle can result in skipped stitches, fabric puckering, or even damage to your sewing machine.
Specialty Sewing Needles
In addition to hand sewing and machine sewing needles, there are also specialty needles available for specific sewing tasks. These needles are designed to make certain sewing techniques easier and more efficient. Here are a few examples:
- Quilting Needles: These needles have a tapered point and are longer in length, allowing for easier stitching through multiple layers of fabric.
- Leather Needles: These needles have a triangular point and are designed for sewing leather, suede, and other heavy materials.
- Stretch Needles: These needles have a specially designed eye and a medium ballpoint, making them ideal for sewing on elastic and other stretch fabrics.
- Twin Needles: These needles have two needles on a single shank and are used to create parallel rows of stitching, often seen in hemming and decorative topstitching.
It is important to have a variety of specialty needles in your sewing kit, especially if you frequently work on specific projects or fabrics. Using the right needle for the job can greatly improve the quality and durability of your sewing projects.
For more information on sewing needles and their uses, you can visit sewing.com or marthastewart.com.
Pins
Pins are essential sewing tools used to hold fabric pieces together temporarily before they are stitched. There are different types of pins available to suit various sewing needs. Let’s explore some of the commonly used pins:
Straight Pins
Straight pins are the most basic type of pins used in sewing. They have a sharp point on one end and a flat head on the other. These pins are ideal for general fabric sewing and can be easily inserted and removed.
Straight pins come in different lengths and thicknesses, allowing you to choose the right pin for your fabric thickness.
Ballpoint Pins
Ballpoint pins are specifically designed for sewing with knit fabrics. The rounded tip of these pins prevents them from damaging or snagging the delicate knit fibers. They are great for pinning stretchy fabrics like jersey or spandex, ensuring that the fabric remains intact and undistorted.
Pearl Head Pins
Pearl head pins are decorative pins that are not only functional but also visually appealing. They have a small pearl-like ball on the head, making them easier to see and handle. These pins are commonly used for delicate fabrics like silk or chiffon, as they glide smoothly through the material without causing any damage.
Safety Pins
Safety pins are larger and sturdier pins that are commonly used for temporary fastening or securing items. They have a coiled spring mechanism that keeps the pin closed until released. Safety pins are versatile and can be used for various purposes in sewing, such as attaching labels, making temporary adjustments, or even as markers for pattern pieces.
Applique Pins
Applique pins are shorter and finer pins, specifically designed for attaching applique pieces to fabric. They have a flat head and a sharp point, allowing for precise placement and temporary fixation of applique designs.
These pins are commonly used in quilting and other fabric embellishment techniques.
Remember to always store your pins in a pincushion or a pin box to keep them organized and prevent any accidents. Now that you know about the different types of pins and their uses, you can choose the right pins for your sewing projects with confidence!
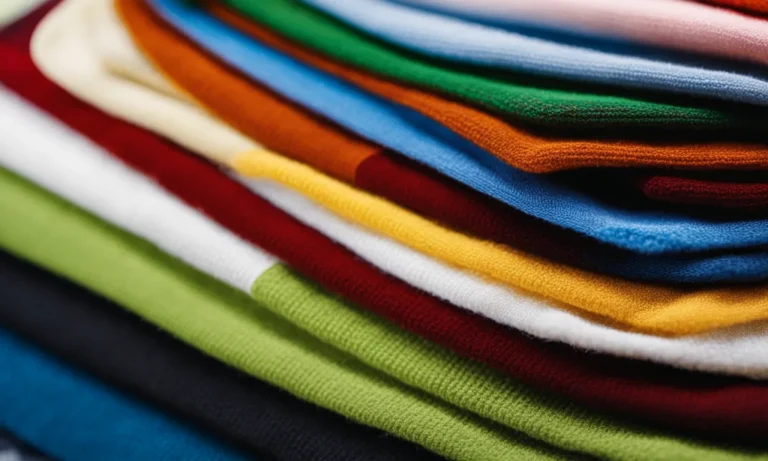
Threads
Threads are an essential component of any sewing project. They are used to stitch fabric pieces together, create decorative designs, and add strength to the seams. There are various types of threads available, each serving a specific purpose. Let’s explore some of the most commonly used threads:
All-Purpose Thread
All-purpose thread is the go-to choice for most sewing projects. It is versatile and can be used on a wide range of fabrics, including cotton, polyester, and blends. This thread is strong and durable, making it suitable for both machine and hand sewing.
It comes in a variety of colors, allowing you to match it perfectly with your fabric.
Heavy Duty Thread
When working with heavy or thick fabrics, such as denim or canvas, heavy-duty thread is the best option. This thread is designed to withstand high tension and provide extra strength to seams. It is often used for sewing upholstery, outdoor gear, or leather items.
Heavy-duty thread is available in different thicknesses, so choose the one that suits your project’s requirements.
Invisible Thread
Invisible thread, as the name suggests, is a transparent thread that becomes virtually invisible when sewn into fabric. It is commonly used for hemming, quilting, or attaching trims, where you don’t want the thread to be visible.
Invisible thread is typically made from nylon or polyester and is available in clear or smoke colors.
Elastic Thread
Elastic thread is a unique type of thread that is used to create shirring or smocking effects in fabric. When stretched, this thread gathers the fabric, creating a ruffled or gathered appearance. Elastic thread is commonly used in sewing projects like waistbands, cuffs, or decorative elements.
It is essential to hand-wind elastic thread onto your bobbin to prevent breakage and ensure proper tension.
Metallic Thread
Metallic thread adds a touch of glamour and sparkle to your sewing projects. It is made by wrapping a metallic foil around a core thread, usually polyester or nylon. Metallic thread is commonly used for decorative purposes, such as embroidery, topstitching, or quilting.
It is important to use a needle specifically designed for metallic thread to prevent breakage and ensure smooth stitching.
Remember, using the right thread for your project is crucial for achieving professional-looking results. Take into account the fabric type, the desired effect, and the strength requirements when selecting the appropriate thread.
Experiment with different threads to discover the possibilities they bring to your sewing creations!
Seam Rippers
Seam rippers are an essential tool for anyone who enjoys sewing or working with fabric. These small, handheld tools are designed to help you remove stitches quickly and easily. Whether you’re fixing a mistake or taking apart a garment for alterations, a seam ripper is your best friend in the sewing room.
How do seam rippers work?
A typical seam ripper consists of a small handle with a pointed metal tip. The tip is inserted under the stitches, and with a gentle push, the sharp blade on the tip cuts through the threads, allowing you to remove them effortlessly.
Seam rippers come in different sizes and shapes, but they all serve the same purpose – to help you undo stitches without damaging the fabric.
Why should you use a seam ripper?
Using a seam ripper instead of scissors or other cutting tools is crucial because it minimizes the risk of accidentally cutting into the fabric. Seam rippers are designed to only cut through the threads, leaving the fabric untouched.
This makes them ideal for delicate fabrics or intricate designs where precision is essential.
Tips for using a seam ripper effectively:
- Hold the fabric securely with one hand while using the seam ripper with the other hand to prevent any accidental slips.
- Work slowly and carefully to avoid tearing the fabric.
- If you’re removing stitches from a seam, start at one end and gently slide the seam ripper under the stitches, lifting them as you go.
- After removing the stitches, use an iron or your fingers to press the fabric to remove any remaining marks or creases from the removed stitches.
Seam rippers are widely available at fabric stores, craft stores, and online retailers. They are relatively inexpensive and a worthwhile investment for anyone who sews regularly. Having a good-quality seam ripper in your sewing kit will save you time and frustration when it comes to correcting mistakes or altering garments.
For more information on seam rippers and other sewing tools, you can visit Sew4Home.com or TheSpruceCrafts.com.
Scissors
Sewing Shears
Sewing shears are a must-have tool for any sewing enthusiast. These scissors are designed with long, sharp blades that make cutting fabric a breeze. They are typically made from high-quality stainless steel, ensuring durability and precision.
Sewing shears are ideal for cutting straight lines and curves, making them perfect for a variety of sewing projects, from garments to quilts. According to a study by the National Sewing Council, using sewing shears can reduce cutting time by up to 50% compared to regular scissors.
Embroidery Scissors
Embroidery scissors are smaller and more delicate than sewing shears. They have sharp, pointed blades that allow for precise cutting in tight spaces. These scissors are commonly used for embroidery work, where intricate details need to be cut with accuracy.
They are also great for trimming thread or snipping small fabric pieces. Embroidery scissors often come with decorative handles, adding a touch of style to your sewing kit.
Pinking Shears
Pinking shears are unique scissors with zigzag blades. These blades create a decorative edge on fabric while also preventing fraying. Pinking shears are commonly used for finishing seams, especially on lightweight fabrics like chiffon or satin.
They can also be used for decorative purposes, adding a fun and unique touch to your sewing projects. Pinking shears are a versatile tool that every sewer should have in their toolbox.
Seam Ripper Scissors
Seam ripper scissors, also known as seam rippers, are essential for any sewing project. These scissors have a small, pointed blade that is perfect for ripping out seams or stitches. They are designed to remove stitches without damaging the fabric, making it easier to fix mistakes or make alterations.
Seam ripper scissors are a lifesaver when it comes to undoing sewing errors and ensuring a professional finish to your garments.
When it comes to choosing scissors for your sewing projects, it’s important to invest in high-quality tools that will last. Look for scissors made from stainless steel, as they are more durable and resistant to rust.
Popular sewing websites like Sew4Home and Sew Essential offer a wide range of sewing tools and accessories, including a variety of scissors to suit your needs. Whether you’re a beginner or an experienced sewer, having the right scissors can make a world of difference in the quality of your work.
Thimbles
A thimble is a small protective covering that is worn on the finger while sewing. It is usually made of metal, plastic, or leather and is designed to protect the finger from the sharp needle. Thimbles have been used for centuries and are an essential tool for any sewing project.
Types of Thimbles
There are several types of thimbles available, each with its own unique features and uses. The most common types include:
- Metal thimbles: These thimbles are typically made of brass or silver and are known for their durability. They provide excellent protection and are often used by experienced sewers.
- Plastic thimbles: These thimbles are lightweight and comfortable to wear. They are a popular choice for beginners or those with sensitive skin.
- Leather thimbles: These thimbles are made of soft leather and provide a good grip on the needle. They are often used for hand sewing or embroidery.
How to Use a Thimble
Using a thimble is simple but requires some practice. Here are a few steps to help you get started:
- Choose the right size thimble that fits comfortably on your finger.
- Place the thimble on the middle finger of your dominant hand.
- Hold the needle between your thumb and index finger.
- Guide the needle through the fabric, using the thimble to push it through.
- Repeat the process until your sewing project is complete.
Tips for Using a Thimble
Here are some additional tips to help you make the most of your thimble:
- Practice: Like any sewing technique, using a thimble takes practice. Start with simple projects and gradually work your way up to more complex ones.
- Proper fit: Make sure your thimble fits snugly on your finger without being too tight. This will ensure maximum protection and comfort.
- Alternate fingers: If you find that one finger becomes sore from prolonged use, switch to a different finger or try using a different type of thimble.
- Take breaks: Sewing for long periods can cause strain on your fingers. Take regular breaks to rest and stretch your hands.
Remember, using a thimble can greatly enhance your sewing experience by protecting your fingers from needle pricks and improving your stitching accuracy. So don’t forget to include this essential tool in your sewing kit!
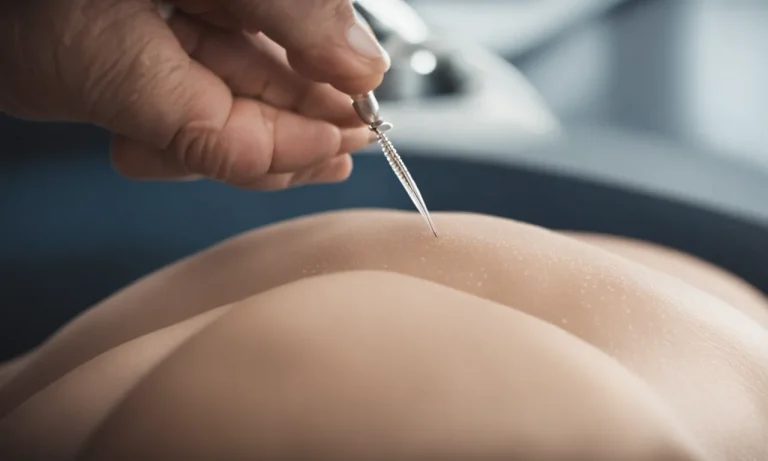
Tracing Wheels and Tracing Paper
Tracing wheels and tracing paper are essential tools for any sewing enthusiast. They are used to transfer patterns or markings onto fabric, making it easier to sew accurately and precisely. Tracing wheels are small, handheld tools with a serrated edge that creates tiny perforations on the tracing paper when rolled over a pattern.
These perforations can then be transferred onto fabric using a pencil or chalk. Tracing paper, on the other hand, is a thin, translucent paper that allows you to see through it and trace the pattern onto the fabric.
Uses of Tracing Wheels and Tracing Paper
Tracing wheels and tracing paper serve several purposes in the sewing process. Firstly, they allow you to transfer intricate pattern markings, such as darts, pleats, or notches, onto the fabric accurately. This ensures that your sewing lines up perfectly and that the final garment fits as intended.
Secondly, they are useful for creating duplicate patterns. By tracing an existing pattern onto tracing paper, you can preserve the original and make multiple copies for future use. This is particularly helpful if you plan to sew the same garment in different sizes or fabrics.
Another use of tracing wheels and tracing paper is for pattern alterations. If you need to adjust the size or shape of a pattern, you can trace it onto tracing paper and make the necessary modifications without altering the original pattern.
This allows you to experiment with different alterations without the fear of ruining the original design.
Tips for Using Tracing Wheels and Tracing Paper
When using tracing wheels and tracing paper, there are a few tips to keep in mind. Firstly, choose a tracing wheel with a serrated edge that matches the type of fabric you are working with. For delicate fabrics, opt for a finer serrated edge to avoid damaging the fabric.
Secondly, ensure that you place the tracing paper and fabric on a stable surface before using the tracing wheel. This will prevent any distortions or mistakes in the transferred markings.
Additionally, it’s important to use a light hand when rolling the tracing wheel over the pattern. Applying too much pressure can lead to uneven or excessive perforations, which may affect the accuracy of the transferred markings.
Finally, always test the tracing wheel and tracing paper on a scrap piece of fabric before using them on your project. This will allow you to check the visibility of the transferred markings and make any necessary adjustments before working on your final garment.
For more information on using tracing wheels and tracing paper, you can visit Threads Magazine. They provide detailed tutorials and tips on various sewing techniques, including using tracing tools.
Measuring Tapes and Rulers
When it comes to sewing, accurate measurements are crucial for achieving a perfect fit. Measuring tapes and rulers are essential tools that every seamstress should have in their toolkit. These tools help you measure and mark fabric accurately, ensuring that your garment or project turns out just the way you want it.
Measuring Tapes
A measuring tape is a flexible tool typically made of fabric or metal. It is used to measure various body parts, fabric lengths, and other dimensions. Measuring tapes come in different lengths, but the most common one used in sewing is the 60-inch tape.
The tape is marked with inches on one side and centimeters on the other, allowing you to work with both imperial and metric measurements.
When using a measuring tape, it’s important to keep it taut but not too tight. Wrap it around the body part or fabric you want to measure, and read the measurement where the zero end of the tape meets the other end.
Make sure to measure at the fullest point if you’re measuring a body part to ensure a comfortable fit.
Rulers
Rulers are rigid tools used for measuring straight lines and drawing precise markings on fabric. They come in various lengths and widths, with the most common ones being 6 inches and 18 inches long. Rulers are typically made of plastic or metal and have markings in inches or centimeters.
When using a ruler, place it on the fabric and align the edge of the ruler with the line you want to measure or draw. Hold the ruler firmly in place to ensure accurate measurements and markings. Rulers are especially useful for measuring seam allowances, hem depths, and creating straight lines for pattern alterations.
Pro tip: If you’re working on a larger project or need to measure larger lengths, consider investing in a yardstick or a longer ruler to make your job easier.
Both measuring tapes and rulers are easily accessible and can be found in most sewing supply stores. They are affordable and essential tools that will greatly enhance your sewing skills. So don’t forget to include them in your sewing toolkit and enjoy the accurate measurements and precise markings they provide!
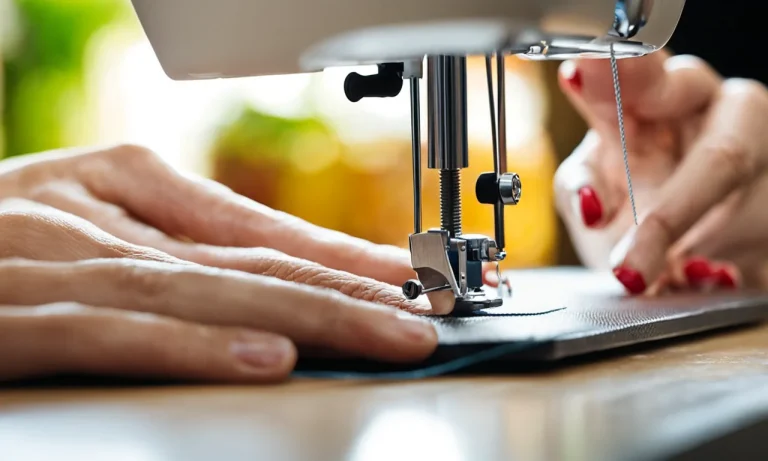
Iron and Ironing Boards
Ironing is an essential step in the sewing process that helps to achieve professional-looking results. To ensure your garments and fabric pieces are wrinkle-free and smooth, you’ll need two key tools: an iron and an ironing board.
The Iron
The iron is a handheld device that uses heat to remove wrinkles and creases from fabric. It typically consists of a flat metal plate with steam vents, temperature controls, and a cord for power. The heat and steam produced by the iron help to relax the fibers in the fabric, making it easier to press and shape.
When choosing an iron, consider factors such as steam output, temperature control, and ease of use. Look for models with adjustable temperature settings to accommodate different types of fabric. Additionally, irons with a high steam output can make ironing more efficient and effective.
The Ironing Board
An ironing board provides a stable and heat-resistant surface for ironing. It consists of a flat padded board, usually covered with a heat-reflective fabric or metal mesh, and a collapsible frame for easy storage.
When selecting an ironing board, look for a sturdy and durable frame that can support the weight of the iron. Consider the size and height of the board to ensure comfortable and ergonomic ironing. Some ironing boards also come with additional features such as adjustable height settings or built-in iron holders.
It’s important to set up your ironing board in a well-ventilated area to allow steam to escape and prevent moisture buildup. Be sure to follow the manufacturer’s instructions for proper care and maintenance of both your iron and ironing board to prolong their lifespan.
For more information on iron and ironing board options, you can visit Consumer Reports or Good Housekeeping.
Conclusion
Having a well-stocked sewing kit is the first step to enjoying your sewing projects and producing high-quality results. Investing in quality tools will make your sewing experiences smooth and frustration-free.
Use this guide as a sewing checklist before beginning your next project, and refer back to it when deciding which new tools to add to your collection. With the essentials covered here, you’ll be fully equipped to sew garments, crafts, home decor items, and more. Happy sewing!