
How To Apply Sequins Without Sewing: A Complete Guide
Glittering sequins can add pizzazz to any fabric project, but sewing them on can be tedious and time consuming. If you want all the glam without the hassle of stitching each sequin in place, this guide will show you clever no-sew methods for attaching sequins so your projects sparkle in no time.
If you’re short on time, here’s a quick answer to your question: There are several effective no-sew techniques for applying sequins, including fabric adhesive, iron-on adhesive, and hem sealing tape. For most fabrics, fabric glue provides the strongest bond for attaching sequins without sewing.
In this comprehensive guide, we will cover everything you need to know to add dazzling sequins to your projects without picking up a needle and thread. You’ll learn the pros and cons of various no-sew application methods and get step-by-step instructions for using fabric glue, iron-on adhesive, hem sealing tape, and more to affix sequins securely.
We’ll also provide tips on choosing the right application method for your fabric type and project needs. Let’s get started glittering up your projects the easy way!
Assessing Your Project’s Sequin Needs
When it comes to applying sequins without sewing, it’s important to assess your project’s sequin needs before getting started. By considering factors such as sequin size and shape, fabric type, location on the project, duration of wear, and washing requirements, you can ensure that your sequin application is successful and long-lasting.
Sequin size and shape
The first step in assessing your project’s sequin needs is to determine the size and shape of the sequins you will be using. Sequins come in a variety of sizes, ranging from small and delicate to larger and more eye-catching. Additionally, they can be round, square, or even custom-shaped.
Consider the overall aesthetic of your project and choose sequins that complement the design.
Fabric type
The fabric type is another important consideration when applying sequins without sewing. Different fabrics have different properties, and not all fabrics are suitable for sequin application. Some fabrics may be too delicate or prone to damage from adhesive or heat.
Consider the fabric’s texture, weight, and durability to ensure that it can withstand the sequin application process without being damaged.
Location on project
Where you plan to apply the sequins on your project is also crucial. Some areas may be more prone to wear and tear, such as the edges of a garment or the corners of a pillow. Consider the durability of the sequin application and whether it will withstand regular use and movement.
Additionally, think about the visibility of the sequins and how they will enhance the overall design.
Duration of wear
The duration of wear is another factor to consider when applying sequins without sewing. If your project is intended for a one-time event or short-term use, you may have more flexibility in your application method.
However, if you plan to wear or use the project frequently, you’ll want to ensure that the sequins are securely attached and won’t easily come loose.
Washing requirements
Lastly, it’s important to consider the washing requirements of your project when applying sequins without sewing. Some sequin applications may be more delicate and require special care during washing, such as hand washing or dry cleaning.
Others may be more durable and able to withstand regular machine washing. Consider how the sequins will hold up during washing and choose a suitable application method accordingly.
By assessing these factors, you can confidently choose the right sequins and application method for your project, ensuring a successful and long-lasting result. For more information on sequin application techniques and tips, you can visit websites like Craftsy.com or SequinQueen.com.
No-Sew Sequin Application Methods
If you want to add some sparkle to your next project but don’t have the time or sewing skills to attach sequins with a needle and thread, don’t worry! There are several no-sew methods that you can use to apply sequins easily and securely. Here are some popular options:
Fabric adhesive
Fabric adhesive is a versatile and easy-to-use option for attaching sequins without sewing. Simply apply a small amount of fabric adhesive to the back of each sequin and press it onto the desired fabric. The adhesive will dry clear, ensuring that your sequins stay in place.
This method is great for adding sequins to clothing, accessories, and even home decor items.
Iron-on adhesive
Iron-on adhesive, also known as fusible web, is another popular method for applying sequins without sewing. This adhesive comes in sheets or rolls that can be cut to the desired size and shape. Simply place the adhesive between the fabric and the sequins, then use a hot iron to activate the adhesive and bond the sequins to the fabric.
This method is especially useful for larger sequin designs.
Hem sealing tape
Hem sealing tape is a great option for adding sequins to the edges of fabric or for creating intricate designs. This double-sided tape is designed to bond fabric together without sewing. Simply apply the tape to the back of the sequins, then press them onto the fabric.
The tape is strong and durable, ensuring that your sequins stay in place even with regular wear and washing.
Static cling method
If you want to easily remove and reposition your sequins, the static cling method is a great choice. Static cling sheets or spray can be used to create a temporary bond between the sequins and the fabric.
Simply cut the cling sheets to the desired size and shape, then press them onto the back of the sequins. The sequins will stick to the fabric without any adhesive, allowing you to easily reposition or remove them as needed.
Fabric stiffener spray
Fabric stiffener spray is a useful tool for adding sequins to lightweight or delicate fabrics. This spray adds stiffness to the fabric, making it easier to attach sequins without sewing. Simply spray the fabric stiffener onto the desired area, then press the sequins onto the fabric.
The stiffener will dry clear, leaving your sequins securely in place.
Double-sided fusible interfacing
Double-sided fusible interfacing is a great option for attaching sequins to fabric that will be stretched or manipulated, such as dance costumes or stretchy garments. This interfacing has adhesive on both sides, allowing you to bond the sequins to the fabric without sewing.
Simply cut the interfacing to the desired size and shape, then sandwich it between the fabric and the sequins. Use a hot iron to activate the adhesive and bond the sequins to the fabric.
Liquid seam sealant
Liquid seam sealant is a handy tool for securing sequins in place without sewing. This adhesive dries clear and flexible, creating a strong bond between the sequins and the fabric. Simply apply a small amount of the sealant to the threads or edges of the sequins, then press them onto the fabric.
The sealant will dry quickly, ensuring that your sequins stay in place even with regular use.
Remember, always follow the instructions on the product packaging when using these no-sew methods for applying sequins. With these techniques, you can easily add some sparkle to your projects without picking up a needle and thread!
Tips for Applying Sequins with Fabric Glue
Choosing the right fabric glue
When applying sequins without sewing, it is important to choose the right fabric glue to ensure a strong and long-lasting bond. Look for fabric glues that are specifically designed for sequin applications. These glues are typically clear, flexible, and dry quickly.
One popular option is Aleene’s Original Fabric Glue, which is widely used and highly recommended by crafters. Remember to read the instructions on the glue bottle for any specific recommendations or precautions.
Applying the glue
Before applying the fabric glue, it is important to clean and dry the surface where you plan to attach the sequins. This will ensure that the glue adheres properly. Using a small brush or a toothpick, apply a thin layer of fabric glue directly onto the area where you want the sequins to be placed.
Avoid applying too much glue, as it may seep through the sequins or cause them to clump together.
Letting the glue cure
After applying the fabric glue, allow it to cure for the recommended amount of time. This will vary depending on the type of fabric glue you are using, so be sure to check the instructions. During this curing process, it is important to avoid touching or moving the fabric to prevent the sequins from shifting or losing their placement.
Pressing down the sequins
Once the fabric glue has cured, gently press down the sequins onto the glued area. This will ensure that they are securely attached and prevent them from falling off. Use a small tool, such as the end of a toothpick or a flat-head screwdriver, to press down each sequin individually.
This will help create a smooth and even surface.
Allowing full bond to form
After pressing down the sequins, allow the fabric glue to fully bond with the fabric. This may take several hours or even overnight, depending on the fabric glue you are using. Avoid wearing or washing the garment until the bond is fully formed to ensure the longevity of the sequins.
Remember, applying sequins with fabric glue requires patience and precision. Take your time and follow these tips to achieve a beautiful and durable sequin design without sewing!
Using Iron-On Adhesive for Sequins
Iron-on adhesive is a great alternative for applying sequins without sewing. It provides a strong bond, ensuring that your sequins stay in place for a long time. Here is a complete guide on how to use iron-on adhesive for sequins.
Selecting an iron-on adhesive
When choosing an iron-on adhesive for your sequins, it’s important to select a high-quality product. Look for adhesives that are specifically designed for fabrics and that can withstand heat. Some popular options include Heat’n Bond and Wonder Under.
These adhesives come in sheets or rolls and are readily available at craft stores or online.
Preparing the fabric
Before applying the iron-on adhesive, it’s essential to prepare the fabric properly. Start by washing and drying the fabric to remove any dirt or residue. Iron out any wrinkles to ensure a smooth surface.
If you’re working with a delicate fabric, place a pressing cloth on top to protect it from direct heat.
Ironing on the adhesive
Follow the instructions provided by the manufacturer to activate the adhesive. Typically, this involves setting your iron to the recommended temperature and placing the adhesive on the fabric with the paper side facing up.
Apply heat and pressure evenly to the adhesive, moving the iron in a circular motion for about 10-15 seconds. This will activate the adhesive and make it ready for the sequins.
Letting it cool
After ironing on the adhesive, allow it to cool completely. This step is crucial as it ensures that the adhesive sets properly and becomes sticky enough to hold the sequins in place. Avoid touching or moving the fabric during this cooling period.
Pressing on sequins
Once the adhesive is cooled, it’s time to press on the sequins. Carefully arrange the sequins on the fabric, following your desired pattern or design. Gently press down on each sequin to secure it in place.
For added durability, you can place a pressing cloth on top of the sequins and apply heat with the iron for a few seconds.
Using iron-on adhesive for sequins is a simple and effective way to add sparkle and glamour to your garments or craft projects. Give it a try, and you’ll be amazed at the results!
Applying Sequins with Hem Sealant Tape
Picking the right tape
When it comes to applying sequins without sewing, hem sealant tape can be a game-changer. It is a double-sided adhesive tape specifically designed for securing hems, trims, and embellishments. When choosing the tape, make sure to opt for a transparent or colorless one to avoid any visible residue on your fabric.
Prepping the fabric
Before applying the hem sealant tape, it is crucial to prepare the fabric properly. Start by cleaning the area where you want to attach the sequins. Use a mild detergent or fabric cleaner to remove any dirt or stains.
Once the fabric is clean and dry, iron it to ensure a smooth and wrinkle-free surface. This will provide a better adhesive surface for the tape.
Adding the tape
Now it’s time to apply the hem sealant tape. Cut the tape into small strips or pieces, depending on the size of the sequins you’ll be using. Place the tape along the edges or areas where you want to attach the sequins. Make sure the tape is secure and covers the entire length of the sequin line.
Press firmly to ensure a strong bond.
Letting tape dry
After applying the tape, allow it to dry completely. The drying time may vary depending on the brand and type of tape you’re using. Check the instructions provided by the manufacturer for specific drying times.
Avoid touching or moving the fabric while the tape is drying to prevent any disruption to the adhesive bond.
Pressing on sequins
Once the tape is dry, it’s time to attach the sequins. Place the sequins on top of the tape, following your desired pattern or design. Press down firmly on each sequin to ensure they adhere securely to the tape.
For added durability, you can use a fabric glue or clear nail polish to further secure the sequins in place.
Applying sequins with hem sealant tape is a convenient and efficient alternative to sewing. It allows you to add a touch of sparkle and glamour to your garments, accessories, or craft projects without the need for a needle and thread. Give it a try and let your creativity shine!
Trying the Static Cling Method
If you want to apply sequins to your clothing or accessories without sewing, the static cling method is a great option. This method involves using either fabric softener or starch to create a temporary adhesive surface for the sequins to stick to.
It’s a simple and easy way to add some sparkle to your wardrobe without the need for a needle and thread.
Using fabric softener
One way to try the static cling method is by using fabric softener. Simply mix equal parts of liquid fabric softener and water in a spray bottle. Lightly mist the area where you want to apply the sequins and press them onto the fabric.
The fabric softener creates a temporary adhesive surface that allows the sequins to cling to the fabric.
Spraying on starch
Another option for the static cling method is to use starch. Mix starch with water according to the instructions on the packaging to create a spray. Spray the mixture onto the fabric, focusing on the area where you want to attach the sequins.
The starch will create a sticky surface that helps the sequins adhere to the fabric.
Letting fabric dry
After applying fabric softener or starch, it’s important to let the fabric dry completely before adding the sequins. This will ensure that the adhesive surface is fully set and ready to hold the sequins securely.
You can speed up the drying process by using a hairdryer on a low setting or by allowing the fabric to air dry naturally.
Adding sequins
Once the fabric is dry, it’s time to add the sequins. Place the sequins on the adhesive surface and press them down gently to ensure they adhere properly. You can arrange the sequins in any pattern or design that you like, allowing your creativity to shine through.
If desired, you can further secure the sequins by applying a clear fabric glue on top of them.
Remember, the static cling method is a temporary solution and may not provide a long-lasting hold for the sequins. However, it’s a fun and easy way to experiment with adding sparkle to your clothing and accessories without the need for sewing.
Sealing Sequins with Fabric Stiffener Spray
Selecting the right stiffener
When it comes to sealing sequins without sewing, using fabric stiffener spray is a great option. The first step is to select the right stiffener for your project. There are different types of fabric stiffeners available in the market, so it’s important to choose one that is suitable for the type of fabric you are working with.
Look for a stiffener that is specifically designed for use on delicate fabrics like silk or chiffon, as these fabrics require a gentler approach.
Preparing fabric
Before applying the fabric stiffener spray, it’s essential to prepare the fabric properly. Start by laying the fabric flat on a clean surface, ensuring there are no wrinkles or creases. If needed, iron the fabric on a low heat setting to remove any existing wrinkles.
This will provide a smooth and even surface for the stiffener to adhere to. It’s also a good idea to place a plastic sheet or newspaper under the fabric to protect your work area from any overspray.
Spraying on stiffener
Once the fabric is prepared, it’s time to apply the fabric stiffener spray. Shake the can well before use to ensure the product is properly mixed. Hold the can about 6-8 inches away from the fabric and spray a light, even coat of stiffener onto the desired area.
Make sure to cover the entire surface evenly, including the edges. Avoid spraying too much at once, as this can lead to a stiff or clumpy finish. It’s better to apply multiple thin coats, allowing each coat to dry before applying the next one.
Allowing to dry
After applying the fabric stiffener spray, it’s important to allow the fabric to dry completely. This usually takes around 24 hours, but drying time may vary depending on the brand of stiffener used and the humidity level in your environment.
It’s best to check the manufacturer’s instructions for specific drying times. Avoid touching or moving the fabric while it’s drying to prevent any smudging or distortion of the sequins.
Affixing sequins
Once the fabric is dry, it’s time to affix the sequins. You can use fabric glue or a hot glue gun to attach the sequins to the fabric. Apply a small amount of glue to the back of each sequin and carefully press it onto the fabric.
Start from one edge and work your way across, following your desired pattern. Take your time and be gentle to avoid damaging the fabric or the sequins. Allow the glue to dry completely before handling or wearing the fabric.
By following these steps, you can easily seal sequins to fabric without the need for sewing. Remember to choose the right fabric stiffener, prepare the fabric properly, apply the stiffener evenly, allow it to dry completely, and affix the sequins with glue.
With a little patience and creativity, you can create stunning sequin designs on various fabrics for a dazzling and unique look.
Applying Sequins with Fusible Interfacing
One method of applying sequins to fabric without sewing is by using fusible interfacing. Fusible interfacing is a thin layer of fabric with a heat-activated adhesive on one side. It can be easily adhered to the fabric using an iron.
Here’s a complete guide on how to apply sequins with fusible interfacing:
Choosing iron-on interfacing
The first step is to choose the right type of iron-on interfacing for your project. There are different weights and types of interfacing available, so consider the weight and stretchiness of your fabric when making your selection.
Look for interfacing that is specifically designed for use with sequins or beads, as it will have a stronger adhesive to hold them in place.
Cutting interfacing to size
Once you have chosen the right interfacing, measure and cut it to the desired size. It should be slightly smaller than the area where you want to apply the sequins. This will ensure that the interfacing doesn’t show through once the sequins are attached.
Ironing it on
Place the cut piece of interfacing with the adhesive side down onto the wrong side of the fabric. Make sure it is positioned correctly and covers the area where you want to apply the sequins. Use a hot iron and press down firmly on the interfacing for a few seconds.
Follow the manufacturer’s instructions for the recommended heat setting and ironing time.
Letting it cool
After ironing, let the fabric cool down completely before moving on to the next step. This will ensure that the adhesive on the interfacing has fully bonded with the fabric, creating a strong and secure base for the sequins.
Adding sequins
Once the fabric is cool, it’s time to add the sequins. Apply a small amount of fabric glue or a hot glue gun to the back of each sequin and press it firmly onto the interfacing. Work in small sections to prevent the glue from drying before you can attach the sequins.
Be creative with the arrangement and colors of the sequins to create your desired design.
Remember to let the glue dry completely before wearing or washing the fabric to ensure that the sequins stay in place.
By following these steps, you can easily apply sequins to fabric without the need for sewing. This method is great for adding sparkle and embellishments to clothing, accessories, or home decor items. Have fun experimenting with different sequin designs and create dazzling pieces!
Using Liquid Seam Sealant for Sequins
When it comes to applying sequins without sewing, using liquid seam sealant can be a game-changer. This adhesive solution creates a strong bond between the sequins and the fabric, ensuring they stay in place. Here is a complete guide on how to use liquid seam sealant for applying sequins.
Picking the right sealant
Before you start, it’s important to choose the right sealant for your project. There are various types of liquid seam sealants available in the market, so make sure to pick one that is suitable for your fabric and sequins.
Look for a sealant that is specifically designed for attaching embellishments like sequins or beads.
One popular brand that many crafters recommend is SeamMagic. Their sealant is known for its strong hold and compatibility with different fabrics.
Prepping the fabric
Before applying the sealant, it’s crucial to prepare the fabric properly. Start by cleaning the fabric to remove any dirt or oils that might affect the adhesion. You can use a mild detergent and water to gently clean the area where you plan to attach the sequins.
Let the fabric dry completely before moving on to the next step.
Painting on sealant
Once the fabric is dry, it’s time to apply the liquid seam sealant. Use a small brush or applicator to carefully paint the sealant onto the fabric in the desired area. Make sure to apply a thin, even layer of sealant to ensure proper adhesion.
Pro tip: To avoid any accidental spills or smudges, you can use masking tape or stencils to create a precise outline for your sequin design.
Drying thoroughly
After applying the sealant, allow it to dry completely. The drying time may vary depending on the brand of sealant you are using, so make sure to read the instructions provided. It’s important to give the sealant enough time to set and create a strong bond with the fabric.
Pressing on sequins
Once the sealant is dry, you can start attaching the sequins. Place the sequins onto the fabric and press them firmly into the sealant. Make sure to position them as desired before pressing, as the sealant creates a strong bond that is difficult to reposition.
Pro tip: If you’re working with larger sequins or multiple layers, you can press the sequins down in sections to ensure they adhere properly.
By following these steps and using liquid seam sealant, you can easily apply sequins without sewing. Remember to choose the right sealant, prep the fabric properly, apply the sealant evenly, let it dry thoroughly, and press on the sequins firmly.
With a little patience and creativity, you’ll have a stunning sequin design that will make any garment or accessory shine!
Tips for Successful Sequin Application
Work on a flat surface
When applying sequins without sewing, it is important to have a stable and flat surface to work on. This will ensure that the sequins are applied evenly and securely. A table or a large cutting mat can be ideal for this purpose.
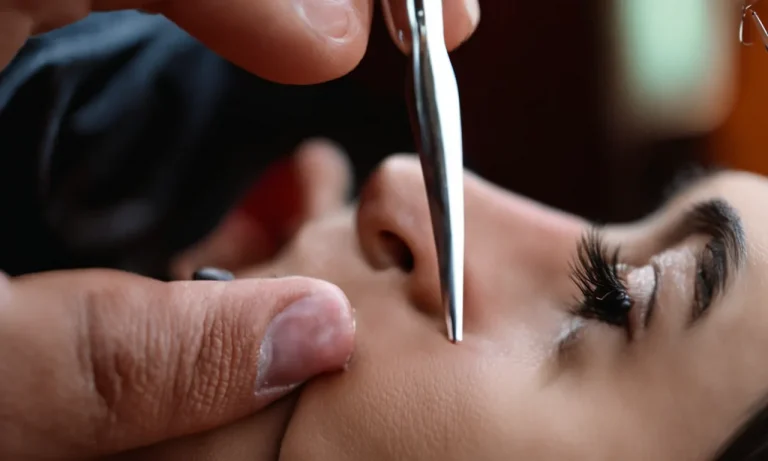
Use pointed tweezers
To make the application process easier, it is recommended to use pointed tweezers. These tweezers allow for precise handling and placement of the sequins. They also help to minimize the risk of damaging the sequins or the fabric.
Apply sequins in patterns
To achieve a visually appealing result, consider applying the sequins in patterns. This can be done by arranging the sequins in rows, circles, or any other design that you prefer. This will add a unique touch to your project and make it stand out.
Mix sequin sizes and shapes
For a more interesting and dynamic look, mix different sizes and shapes of sequins. This will create depth and texture, adding an extra layer of visual interest to your project. Experiment with different combinations to find the perfect mix.
Overlap edges slightly
When applying sequins, it is important to overlap the edges slightly. This ensures that there are no gaps between the sequins, giving a smooth and seamless appearance. Take care not to overlap too much, as this can distort the overall design.
Press firmly to ensure bond
To secure the sequins in place, press them firmly onto the fabric. This will help to create a strong bond between the sequin and the fabric, ensuring that they stay in place even with regular wear. Be gentle yet firm while pressing to avoid damaging the sequins.
Check connections frequently
Throughout the application process, it is important to regularly check the connections between the sequins. This will help identify any loose sequins or areas that require additional reinforcement. It is easier to fix any issues as you go rather than after the entire project is completed.
Remember, practice makes perfect. Don’t be discouraged if your first attempt doesn’t turn out exactly as you envisioned. With time and practice, you’ll become more skilled at applying sequins without sewing.
Conclusion
With so many no-sew methods available, you can add dazzling sequins to clothing, accessories, home decor, crafts, and more without ever having to break out the needles and thread. Whether you use fabric glue, iron-on adhesive, or another sequin application technique, following the instructions carefully is key for getting a strong, durable bond.
The next time you want to make something shimmer and shine, try one of these handy no-sew sequin application methods. Your projects will sparkle stunningly – minus the tedious hand sewing required with stitched-on sequins.
So unleash your inner magpie and start embellishing your favorite fabrics with brilliant sequins the easy way!